Running OWASP Juice Shop
System requirements
To run a single instance of Juice Shop the following memory and CPU requirements apply. These resources are needed for the Juice Shop application process itself, and they are based on
- a 30-day average
process CPU and RAM usage of the official public demo instance running
v14.0.1of Juice Shop - a training with ~30 participants on a MultiJuicer cluster hosted on OpenShift with Juice Shop
v14.0.1
Please note that any additional resources needed by your environment (e.g. Docker or Vagrant) come on top.
- Minimum system specification
256 MBRAM200 millicpuCPU300 MBfree disk space
- Recommended system specification
384 MBRAM400 millicpuCPU800 MBfree disk space
🗄️ If installing from sources without the --depth 1 option, an additional 700
MB free disk space are required for the Git history in both minimum and
recommended spec.
Run options
In the following sections you find step-by-step instructions to deploy a running instance of OWASP Juice Shop for your personal hacking endeavours.
Local installation
To run the Juice Shop locally you need to have Node.js installed on your computer. The Juice Shop officially runs on versions 16.x, 18.x and 20.x of Node.js, closely following the official Node.js Long-term Support Release Schedule. During development and Continuous Integration (CI) the application is automatically tested with these current versions of Node.js. The officially recommended version to run Juice Shop is either the most recent Long-term Support (LTS) version or the Current Release version. Therefore Juice Shop recommends Node.js 18.x for its own v15.0.0 release.
From sources
- Install Node.js on your computer.
- On the command line run
git clone
https://github.com/juice-shop/juice-shop.git --depth 1
. - Go into the cloned folder with
cd juice-shop - Run
npm install. This only has to be done before the first start or after you changed the source code. - Run
npm startto launch the application. - Browse to http://localhost:3000
From pre-packaged distribution
- Install a 64bit Node.js on your Windows, MacOS or Linux machine.
- Download
juice-shop-<version>_<node-version>_<os>_x64.zip(or.tgz) attached to the latest release on GitHub. - Unpack the archive and run
npm startin unpacked folder to launch the application - Browse to http://localhost:3000
Docker image
You need to have Docker installed to run
Juice Shop as a container inside it. Following the instructions below
will download the current stable version (built from master branch on
GitHub) which internally runs the application on the currently
recommended Node.js version 18.x.
- Install Docker on your computer.
- On the command line run
docker pull bkimminich/juice-shopto download thelatestimage described above. - Run
docker run -d -p 3000:3000 bkimminich/juice-shopto launch the container with that image. - Browse to http://localhost:3000.
If you are using Docker on Windows - inside a VirtualBox VM - make sure
that you also enable port forwarding from host 127.0.0.1:3000 to
0.0.0.0:3000 for TCP.
Supported architectures
The official Docker image is built automatically during CI/CD for
linux/amd64 (based on a Node.js 18.x image) as well as linux/arm64 and linux/arm/v7 (based on a Node.js 14 image) and both are pushed to DockerHub. The following tagged images are available on DockerHub:
- Stable version from
masterbranch:latestfor AMD/ARM64 andlatest-armfor ARMv7 - Development version from
developbranch:snapshotfor AMD/ARM64 andsnapshot-armfor ARMv7 - Tagged versioned releases:
vX.Y.Zfor AMD/ARM64 andvX.Y.Z-armfor ARMv7
Vagrant
Vagrant is an open-source solution for building and maintaining virtual
software development environments. It creates a Virtualbox VM that will
launch a Docker container instance of the latest Juice Shop image
v15.0.0.
- Install Vagrant and Virtualbox
- Run
git clone https://github.com/juice-shop/juice-shop.git(or clone your own fork of the repository) - Run
cd vagrant && vagrant up - Browse to http://192.168.56.110
Amazon EC2 Instance
You need to have an account at Amazon Web Services in order to create a server hosting the Juice Shop there.
- In the EC2 sidenav select Instances and click Launch Instance
- In Step 1: Choose an Amazon Machine Image (AMI) choose an Amazon Linux AMI or Amazon Linux 2 AMI
- In Step 3: Configure Instance Details unfold Advanced Details and copy the script below into User Data
- In Step 6: Configure Security Group add a Rule that opens port 80 for HTTP
- Launch your instance
- Browse to your instance's public DNS
#!/bin/bash
yum update -y
yum install -y docker
service docker start
docker pull bkimminich/juice-shop
docker run -d -p 80:3000 bkimminich/juice-shop
AWS EC2 Launch Template
- In the EC2 sidenav select Launch Templates and click Create launch template
- Under Launch template contents select as AMI ID either Amazon Linux AMI or Amazon Linux 2 AMI (by using Search for AMI)
- In the same section add a Security Group that opens port 80 for HTTP
- Unfold Advanced details at the bottom of the screen and paste in the script above into User Data
- Create your launch template
- Launch one or multiple EC2 instances from your template
- Browse to your instance's public DNS
Azure Container Instance
- Open and login (via
az login) to your Azure CLI or login to the Azure Portal, open the CloudShell and then choose Bash (not PowerShell). - Create a resource group by running
az group create --name <group name> --location <location name, e.g. "centralus"> - Create a new container by running
az container create --resource-group <group name> --name <container name> --image bkimminich/juice-shop --dns-name-label <dns name label> --ports 3000 --ip-address public - Your container will be available at
http://<dns name
label>.<location name>.azurecontainer.io:3000
Azure Web App for Containers
- Open your Azure CLI or login to the Azure Portal, open the CloudShell and then choose Bash (not PowerShell).
- Create a resource group by running
az group create --name <group name> --location <location name, e.g. "East US"> - Create an app service plan by running
az appservice plan create --name <plan name> --resource-group <group name> --sku S1 --is-linux - Create a web app with the
Juice Shop Docker
image by running the following (on one line in the bash shell)
az
webapp create --resource-group <group name> --plan <plan name>
--name <app name> --deployment-container-image-name bkimminich/juice-shop
Google Compute Engine Instance
- Login to the Google Cloud Console and open Cloud Shell.
- Launch a new GCE instance based on the juice-shop container. Take
note of the
EXTERNAL_IPprovided in the output.
gcloud compute instances create-with-container owasp-juice-shop-app --container-image bkimminich/juice-shop
- Create a firewall rule that allows inbound traffic to port 3000
gcloud compute firewall-rules create juice-rule --allow tcp:3000
- Your container is now running and available at
http://<EXTERNAL_IP>:3000/
Heroku

- Click the
Deploy to Heroku button in the
Setup section of the
README.mdon GitHub
If you have forked the Juice Shop repository on GitHub, the Deploy to Heroku button will deploy your forked version of the application. To deploy the latest official version you must use the button of the original repository at https://github.com/juice-shop/juice-shop.
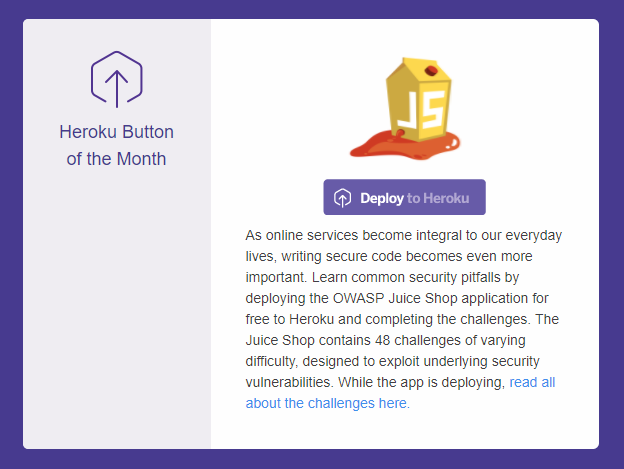
As a little related anecdote, the OWASP Juice Shop was crowned Heroku Button of the Month in November 2017 and once more in March 2019:
Gitpod
Login to gitpod.io and use https://gitpod.io/#https://github.com/juice-shop/juice-shop/ to start a new workspace. If you want to spin up a forked repository, your URL needs to be adjusted accordingly.
After the Gitpod workspace is loaded, Gitpod tasks is still running to install
npm installand launch the website. Despite Gitpod showing your workspace state already as Running, you need to wait until the installation process is done, before the website becomes accessable. The Open Preview Window (Internal Browser), will open automatically and refresh itself automatically when the server has started.Your Juice Shop instance is now also available at
https://3000-<GITPOD_WORKSPACE_ID>.<GITPOD_HOSTING_ZONE>.gitpod.io.
Installing a specific release version
The installation instructions above will all give you the latest official release version of the Juice Shop. If you want to install a specific older version, you can easily do so by retrieving the corresponding tag from GitHub or Docker. For release v7.5.1 - which was the last version with the original AngularJS/Bootstrap frontend - for example:
- From sources - Run
git fetch --tagsand thengit checkout v7.5.1before runningnpm install - Docker image - Run
docker pull
bkimminich/juice-shop:v7.5.1
instead of the usualdocker pull bkimminich/juice-shop - From pre-packaged distribution - Just download the older release from https://github.com/juice-shop/juice-shop/releases or https://sourceforge.net/projects/juice-shop/files/
To experience a preview of the next upcoming Juice Shop version you can do as follows:
- Simply visit https://juice-shop-staging.herokuapp.com and take a look
- From sources - Run
git fetchand thengit checkout developbefore runningnpm install - Docker image - Run
docker pull bkimminich/juice-shop:snapshotinstead of the usualdocker pull bkimminich/juice-shop
ℹ️ Please be aware that support by the core team or community is limited (at best) for outdated and unreleased versions alike. To fully enjoy your OWASP Juice Shop experience, it is recommended to always use the latest version.
Self-healing-feature
OWASP Juice Shop was not exactly designed and built with a high availability and reactive enterprise-scale architecture in mind. It runs perfectly fine and fast when it is attacked via a browser by a human. When under attack by an automated tool - especially aggressive brute force scripts - the server might crash under the load. This could - in theory - leave the database and file system in an unpredictable state that prevents a restart of the application.
That is why - in practice - Juice Shop wipes the entire database and the
folder users might have modified during hacking. After performing this
self-healing the application is supposed to be restartable, no matter
what kind of problem originally caused it to crash. For convenience the
self-healing happens during the start-up (i.e. npm start) of the
server, so no extra command needs to be issued to trigger it.
Single-user restriction
There is one fundamental restriction that needs to be taken into account when working with the OWASP Juice Shop, especially in group trainings or lectures:
A server instance of OWASP Juice Shop is supposed to be used by only a single-user!
This restriction applies to all the Run Options explained above. It is technically necessary to make the Self-healing-feature work properly and consistently. Furthermore, when multiple users would attack the same instance of the Juice Shop all their progress tracking would be mixed leading to inevitable confusion for the individual hacker. The upcoming Challenge tracking chapter will illustrate this topic.
It should not go unmentioned that it is of course okay to have multiple users hack the same instance from a shared machine in a kind of pair-hacking-style.
If you want to centrally host Juice Shop instances for multiple users you find more information in section Hosting individual instances for multiple users of the trainer's guide.